If you want your mums to return stronger and more colorful each fall, overwintering them is key. Start preparing now so they survive the cold and surprise you next season.
Why It’s Worth It
Growing new mums every year can get expensive. But if you overwinter your existing plants, you:
- Save money
- Preserve varieties you love
- Build a more sustainable garden
- Enjoy stronger, established plants next fall
When to Start Planning
You don’t have to wait until frost hits. As fall begins:
- Look for healthy, robust plants
- Stop aggressive fertilizing
- Plan where and how you’ll protect them during winter
Starting early reduces shock and increases success.
Four Ways to Protect Your Mums Through Winter
You have a few methods to choose from. Pick what fits your climate and space best.
| Method | How It Works | Pros & Things to Watch |
|---|---|---|
| In-ground planting | Transplant the potted mum into garden soil | Best insulation for roots, but more labor to dig and move |
| Bury the pot | Leave the plant in its container and bury it in the ground | Easier to deal with later, while still offering root protection |
| Indoor storage | Move the pot indoors to a cool, dark spot | No digging required, but you need to maintain dormancy conditions |
| Heavy mulching in place | Keep plants where they are and insulate them deeply | Low effort, though success depends heavily on insulation in your zone |
How to Do Each Method
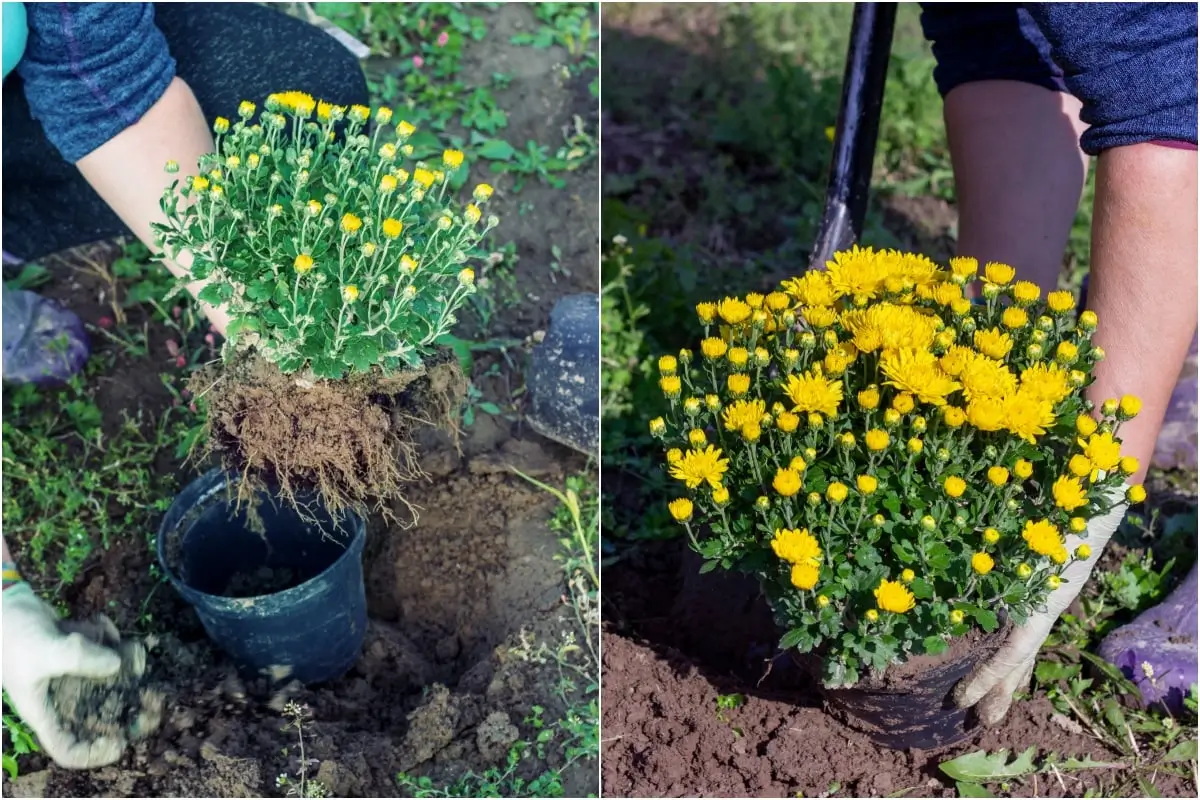
1. Planting in the Soil
- Choose a sunny spot with good drainage
- Dig a hole a bit larger than the pot
- Loosen the root ball, place it, and backfill
- Add compost and then a 3–4 inch mulch layer
- After first frost, cut the stems back to 4–6 inches
- Cover with extra mulch in late winter
2. Burying the Pot
- Dig a hole that fits the entire pot
- Sink the pot so the rim is level with the surrounding soil
- Mulch heavily over and around the pot
- In early spring, carefully lift the pot and refresh soil/root system
3. Bringing Indoors
- Prune stems back to 4–6 inches
- Place the pot in a cool, dark area (garage, basement, unheated room)
- Water sparingly — just enough to keep roots from drying out
- In early spring, gradually reintroduce light and resume normal watering
4. Heavy Mulching Outdoors
- Trim stems to 4–6 inches
- Surround the plant with 8–12 inches of mulch (straw, leaves, wood chips)
- Add a breathable fabric cover, if needed, to keep mulch in place
- In spring, remove mulch slowly and allow plant to wake naturally
Spring & Summer Care After Winter
Once cold passes, help your mums bounce back:
- Remove mulch gradually
- Repot or refresh soil if needed
- Provide 6–8 hours of sun daily
- Water when the top inch of soil is dry
- Fertilize lightly — first for foliage, then shift to boost blooms
- Pinch off early buds to encourage branching (especially in July)
These steps will encourage healthy, full blooms next fall.
Troubleshooting & Tips
- Rot or soggy roots — often from overwatering or poor drainage
- Cold damage — happens when insulation is insufficient or freezes reach the root zone
- Rodent damage — critters sometimes nibble stems under mulch, so use a mesh barrier if needed
- Start with a few plants before committing your whole mum collection
Final Thoughts
Wintering mums isn’t just about survival — it’s about giving them a head start for next season. With the right method, a little mulch, and patience, your mums can become a long-term, rewarding part of your garden.
Ready to get started? Choose your method today, begin your mulch or indoor setup, and look forward to vibrant mums again this fall.